There are various ways to output results from an Aimsun model but one of the most accessible for non-technical audiences is a video recording of a simulation. Here are some tips for using the recording tool to make your videos as impressive as possible.

Record
Before you even start recording anything, it is important to set your preferences in the “Project Preference Editor”.
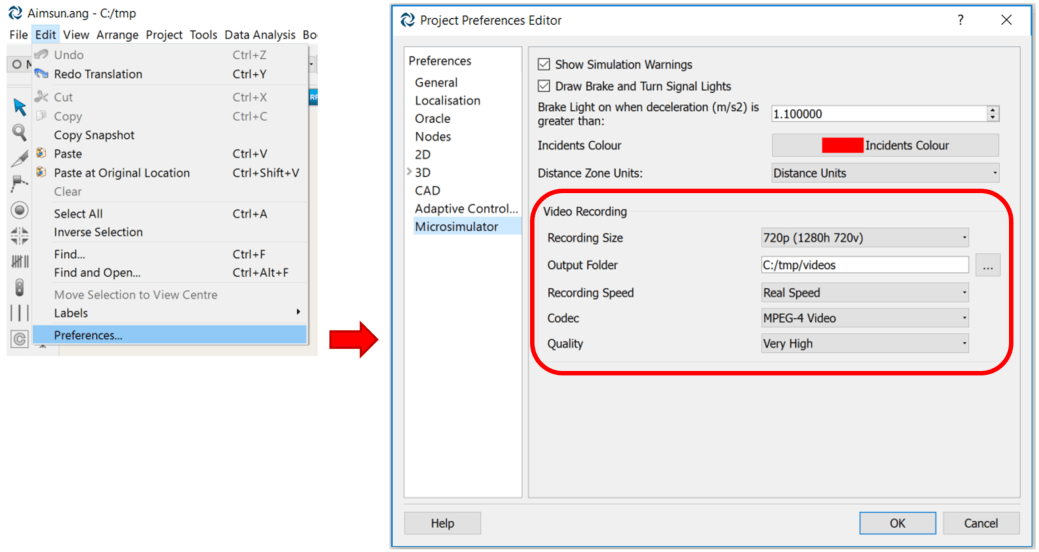
Click to enlarge: Project Preference Editor
Recording size
Use standardized screen dimensions for showing your video in public using different screens. Most videos are filmed in either 16:9 (panoramic, see picture below) or 4:3:
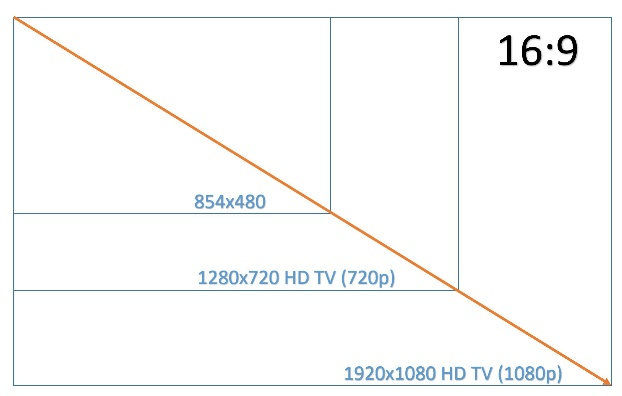
Click to enlarge: Screen dimensions
To choose the best screen size for your requirements, follow one of the two options:
Adjust the size of your Aimsun view by dragging the menu to the left to adjust width and upwards to adjust height and choose the option “View Size” in the Preference Editor, Microsimulator tab. This is an easy way to know which part of the Aimsun view is included in your video:
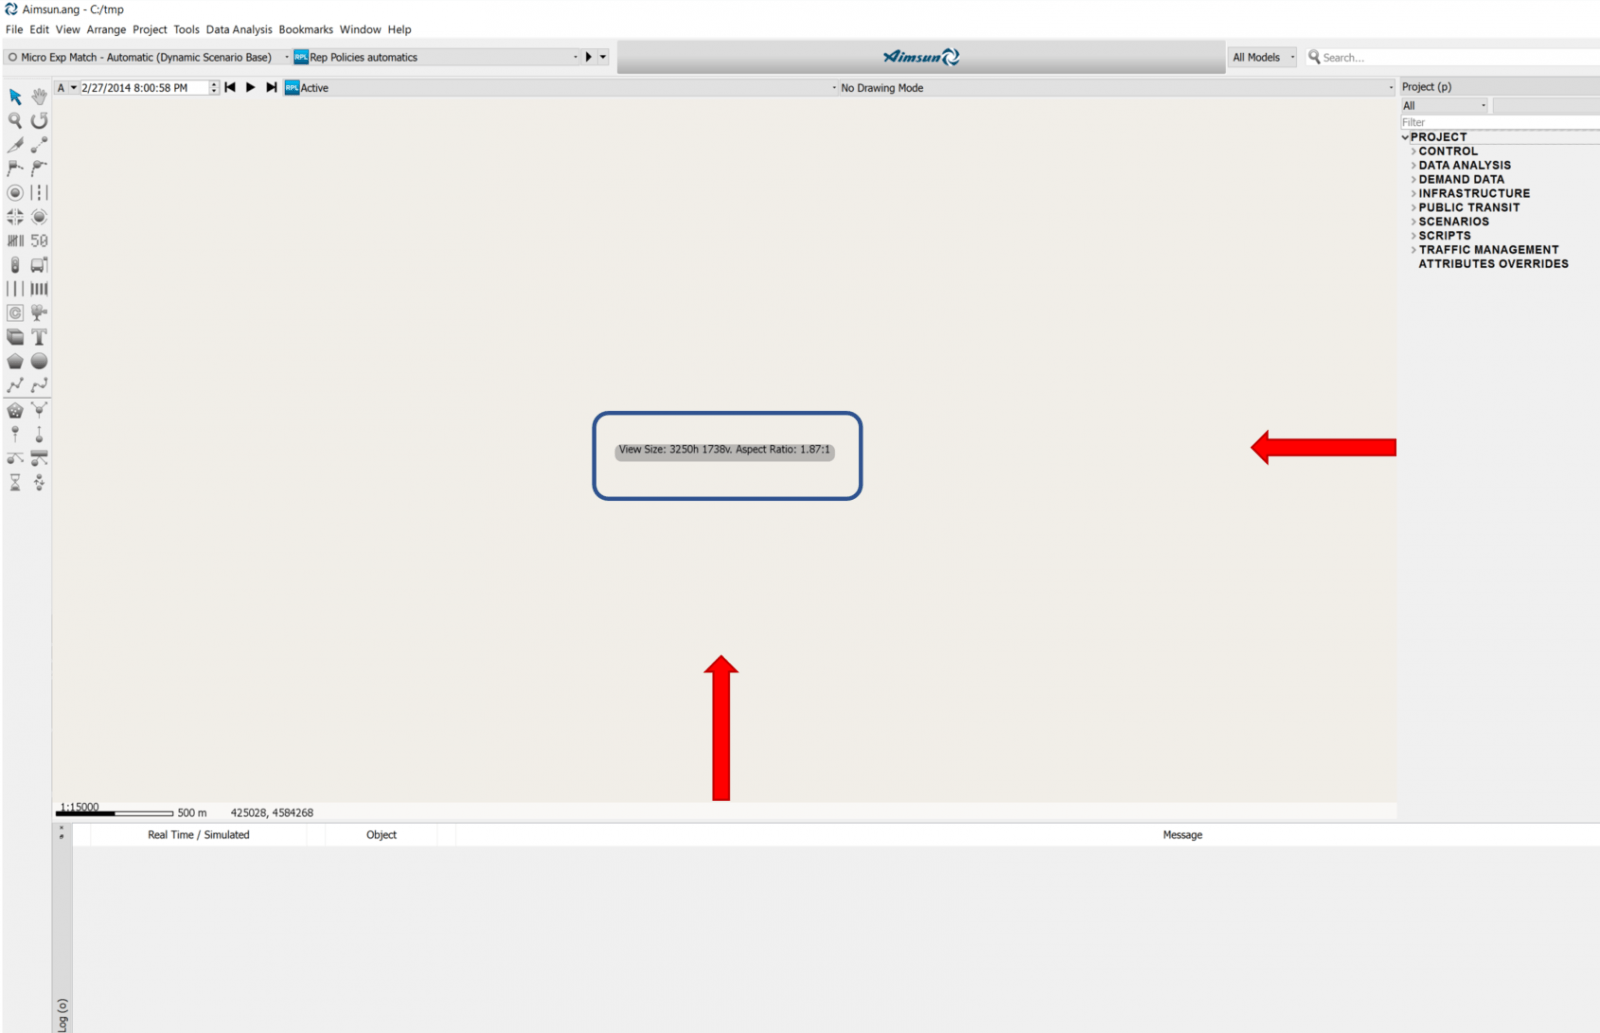
Click to enlarge: Choose the best screen size
Choose one of the standard sizes provided in the Recording Size drop-down menu in the Project Preference Editor.
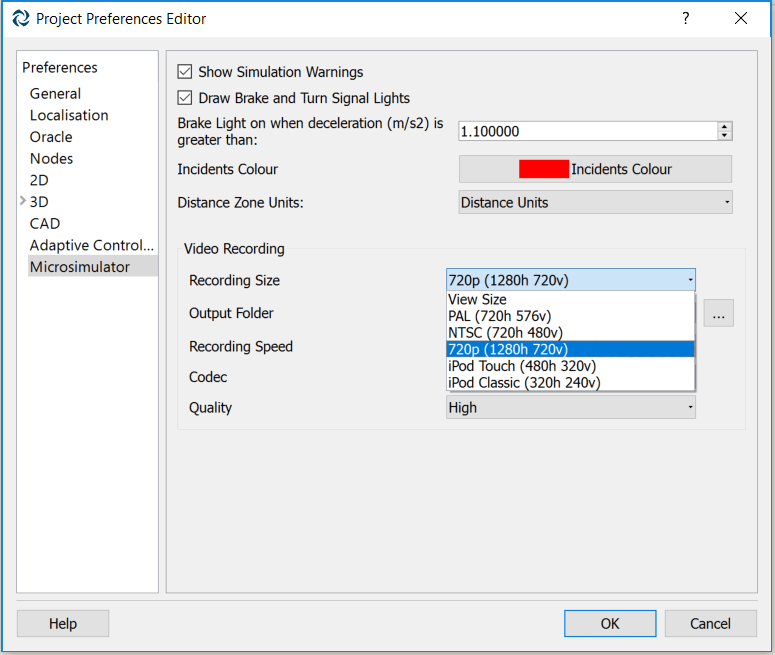
Click to enlarge: Recording Size drop-down menu
Video resolution and frame rate
It is not easy to find the perfect balance of quality and file size. Keep the file size down by avoiding saving videos with a frame rate higher than 40 frames per second (anything over 40 fps is imperceptible to the human eye). The frame rate is defined as how many unique consecutive images are displayed per second in the video to give the illusion of movement; the frame rate can be calculated as follows:
Frame Rate=(Recording Speed)/Smoothness
where Recording Speed can be specified in “Edit | Preferences | Microsimulator”:
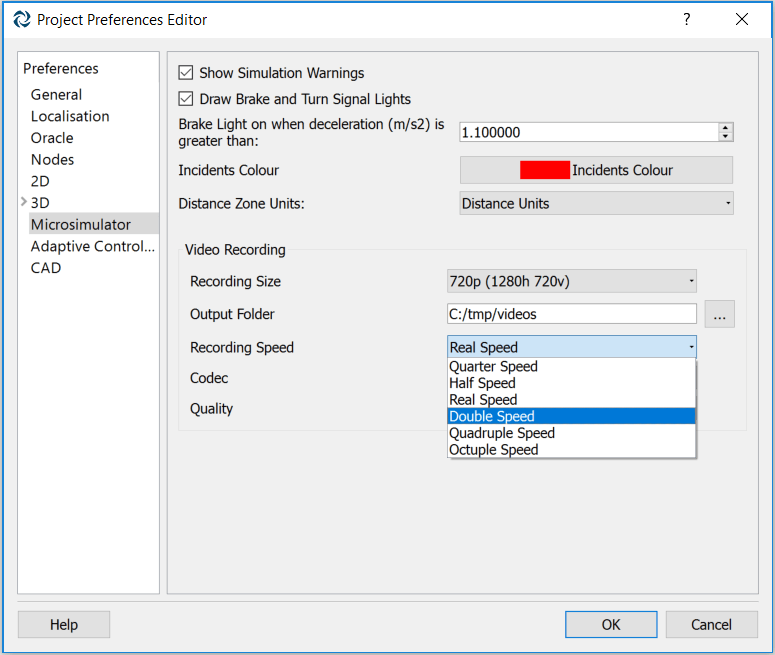
Click to enlarge: Specify recording speed
(Quarter Speed= 0.25; Half Speed= 0.5; Real Speed= 1; Double Speed= 2; Quadruple Speed = 4; Octuple Speed = 8)
Simulation smoothness is set in the display bar:

Click to enlarge: Set simulation smoothness

Very fine = 0.05

Fine = 0.10

Very low = 0.40
For example:
Play at double speed, very fine –> Frame Rate = 2 / 0,05 = 40 fps (OK)
Play at quadruple speed, very fine –> Frame Rate = 4 / 0,05 = 80 fps (too high, select “Fine” instead of “Very fine”)
Once you have selected the smoothness and recording speed, set the speed as ∞ in the display bar:

Click to enlarge: set the speed as ∞ in the display bar
Define the compression code
Select the video compression in the Codec: MPEG-4 is an industry standard that is compatible with different operating systems and provides a good ratio of quality to file size.
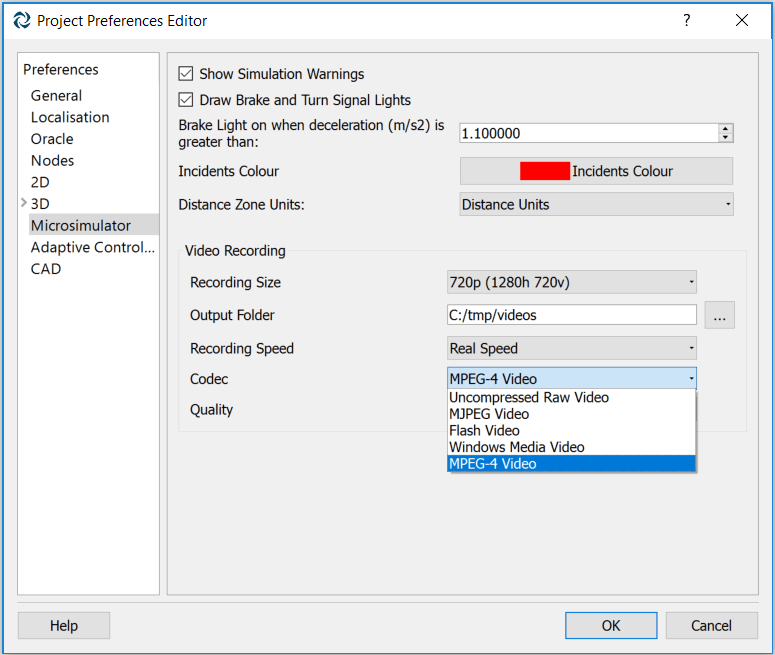
Select the video compression in the Codec
Define compression quality
Compression quality also influences file size. Try using the “Very high” or “High” quality setting for a good quality video: it will define the number of bits used to represent each second of material.
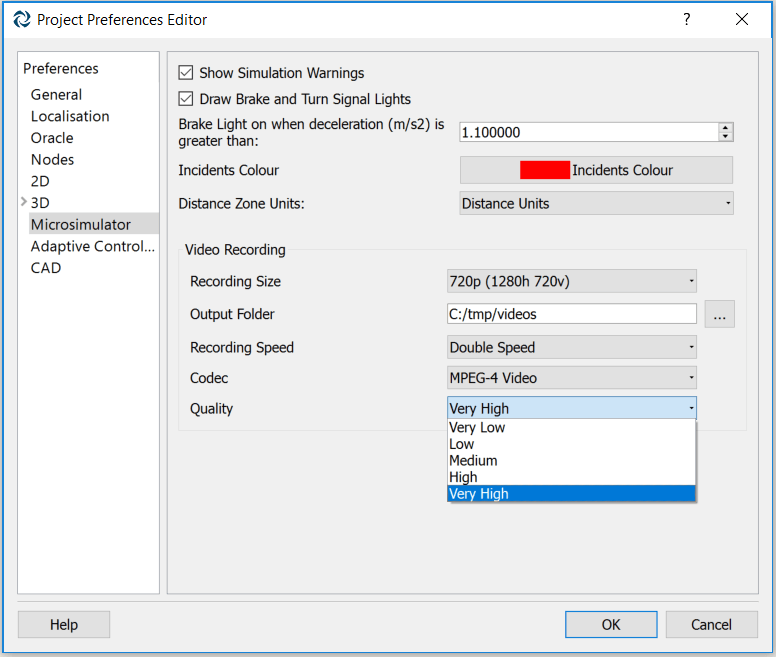
Click to enlarge: Define compression quality
Add a time reference, background color and your company logo
In the “Project Properties Editor | 2D” you can choose to show the clock (in either absolute or relative time), add their own company logo to the video or change the background color.
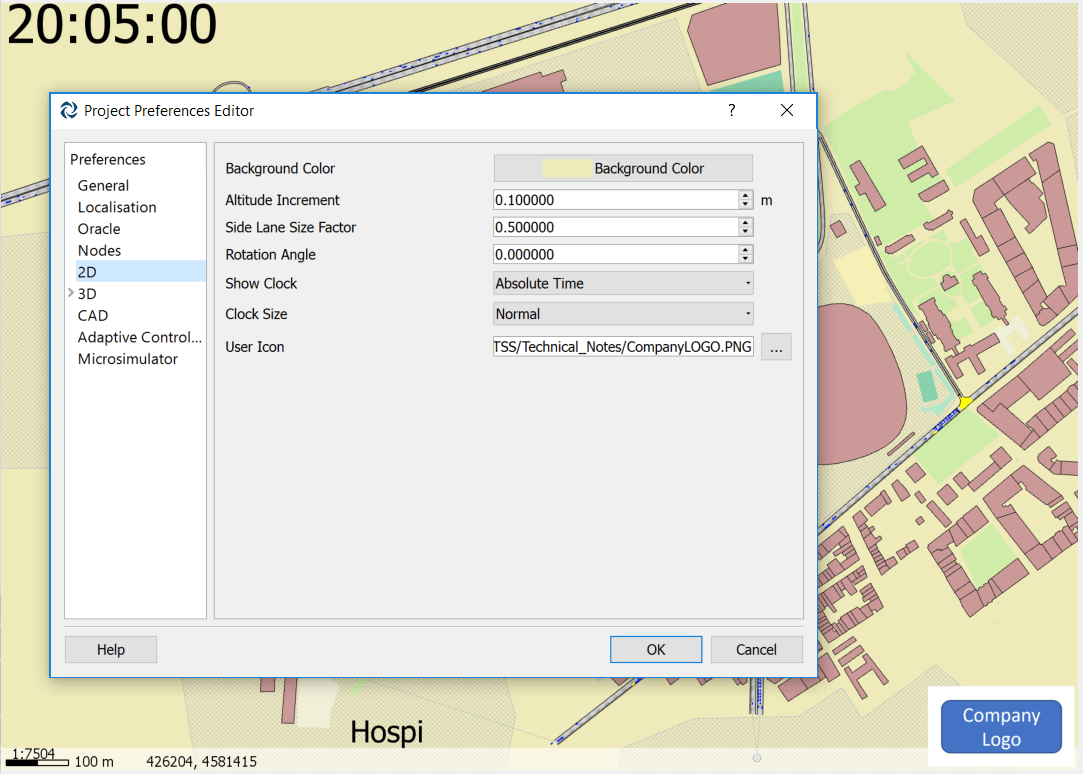
Click to enlarge: Add a time reference, background color and your company logo
Related tips
Importing decoration from OpenStreetMap to Aimsun
Building a 3D model from OpenStreetMap decoration
Aimsun: import objects from SketchUp 3D modelling software


