
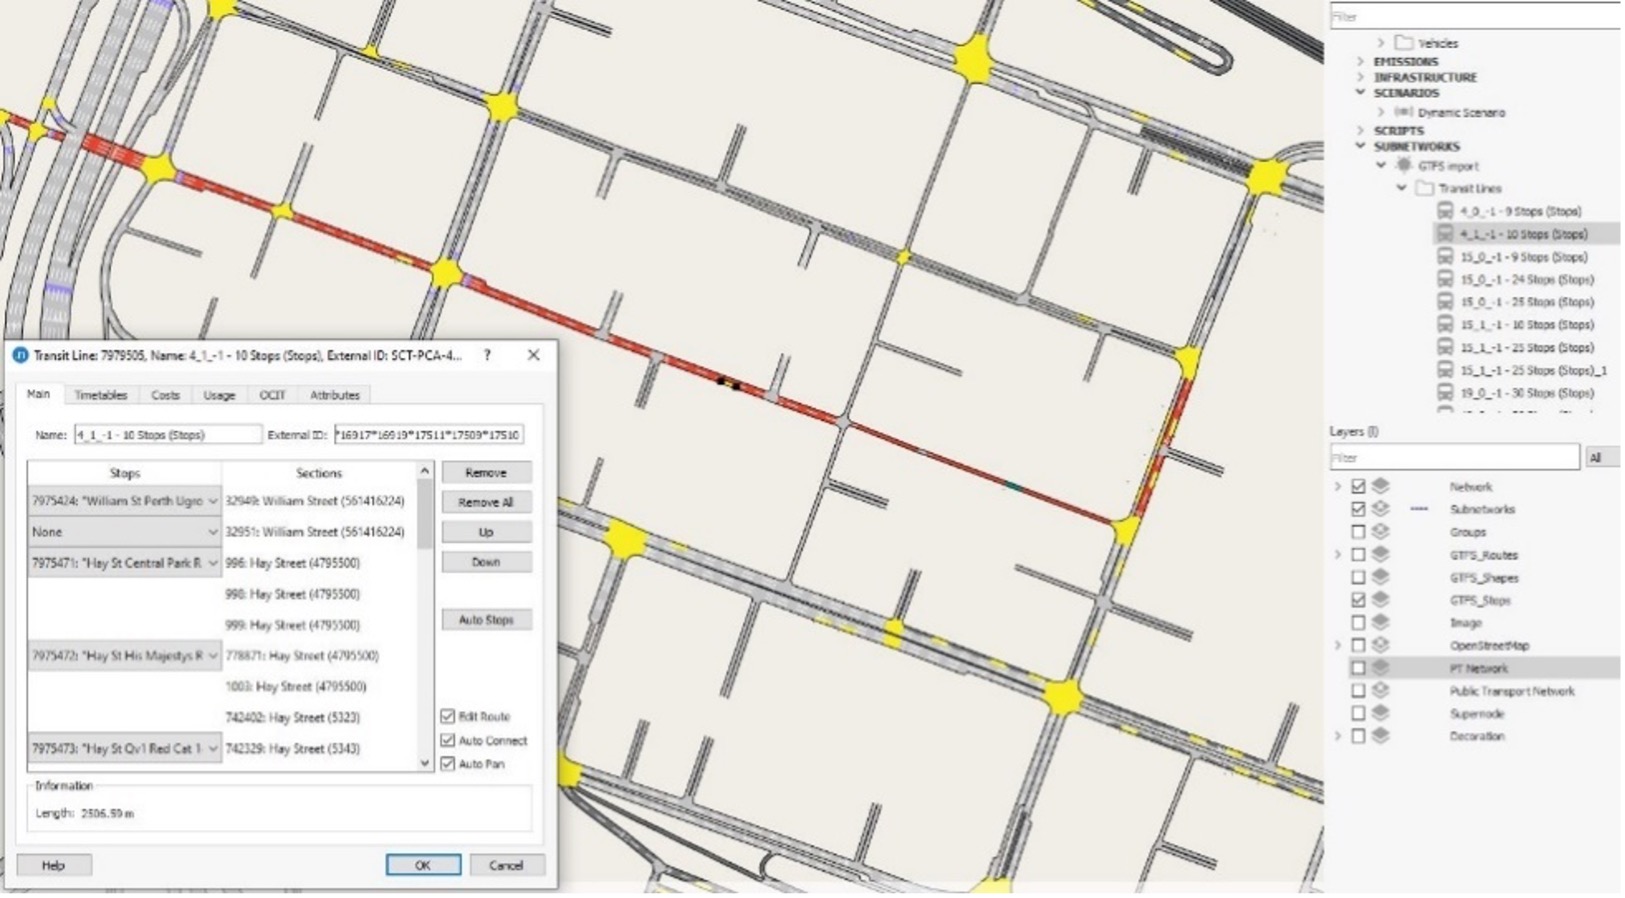


Importing GTFS data into your Aimsun Next network
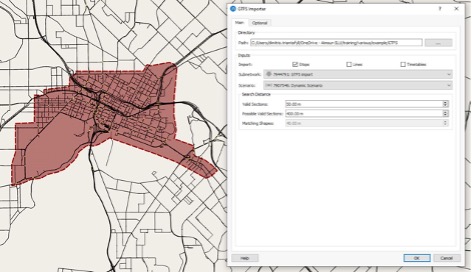
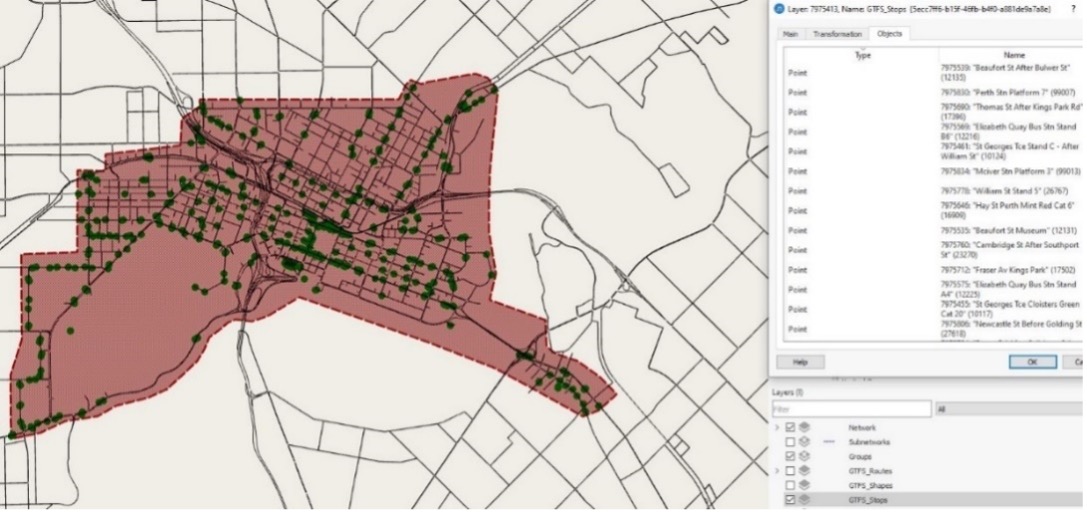
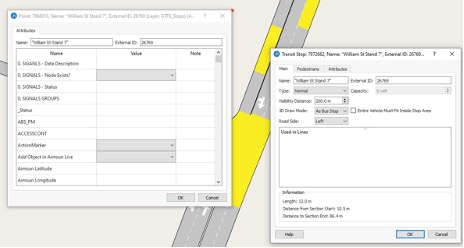
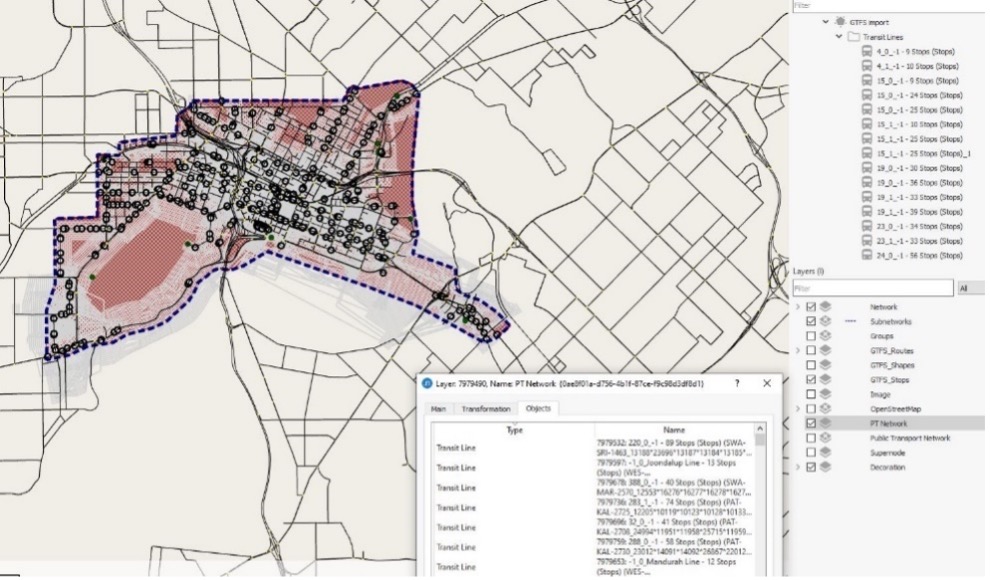
July 2021: GTFS feeds enable transit or public transport agencies to publish their data, and developers to write applications that use this data in an interoperable way. Dimitris Triantafyllos explores how to import this GTFS data into an Aimsun Next model.