You can use groupings of sections or detectors to define screenlines. Screenlines can be used for OD demand adjustment and for validation.
Screenlines for OD demand adjustment
Create a grouping category for detectors (or sections), and call it “screenlines” for convenience; inside, create a grouping for each screenline that you want to define. Open the groupings and select all the detectors (or the section) that you want to include in each screenline. In Figure 1, two detectors have been grouped to form a screenline for incoming traffic from the western boundary.

Click to enlarge. Figure 1: Define detector screenlines
In the main tab of the OD Adjustment Scenario, select the grouping category you have created for screenlines under Use Detection Groupings. The real data set should provide counts for individual detectors, as Aimsun will calculate the screenline count on the fly.

Click to enlarge. Figure 2: Use of screenlines in the OD demand adjustment process
This will make Aimsun adjust the demand considering the total count for each screenline, and individual detector counts for all detectors included in the real data set but not belonging to any screenline.
When doing an OD adjustment, screenlines prevent overfitting the result to individual detection points, or in other words, constraining it to a specific path assignment solution at some locations.
Screenlines for validation
Another use of screenlines is for validation. In this case you have to create a single real data set with two data sources (see Figure 3 and Table 1):
1. One that contains the data for detectors that don’t belong to any screenline; each record has to be associated to a detector using its ID, external ID or name;
2. One that contains the data for screenlines, which are the total of all the detectors that belong to each screenline; each record has to be associated to a grouping using its ID, external ID or name.
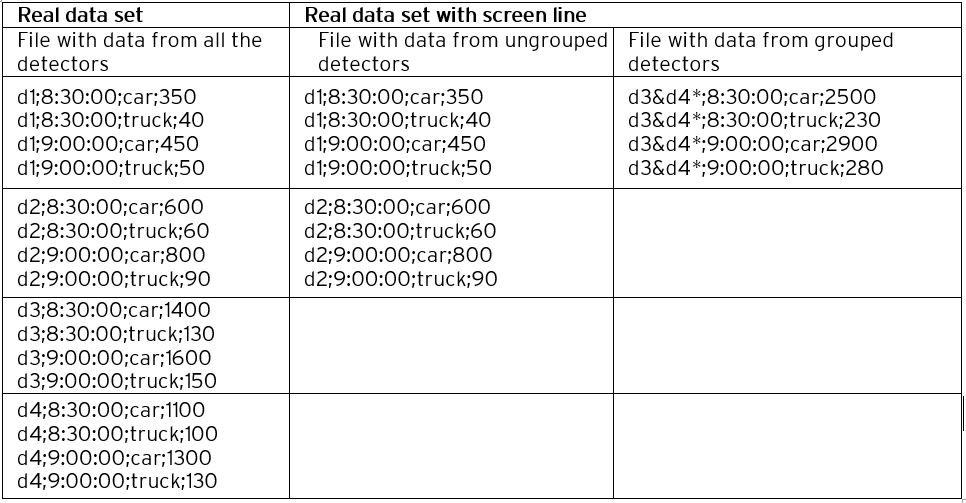
Click to enlarge. Table 1. Content of the file with data source
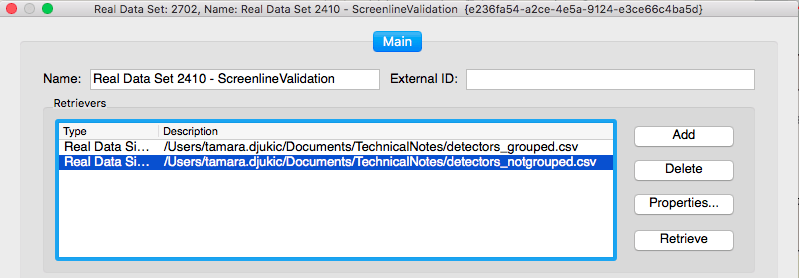
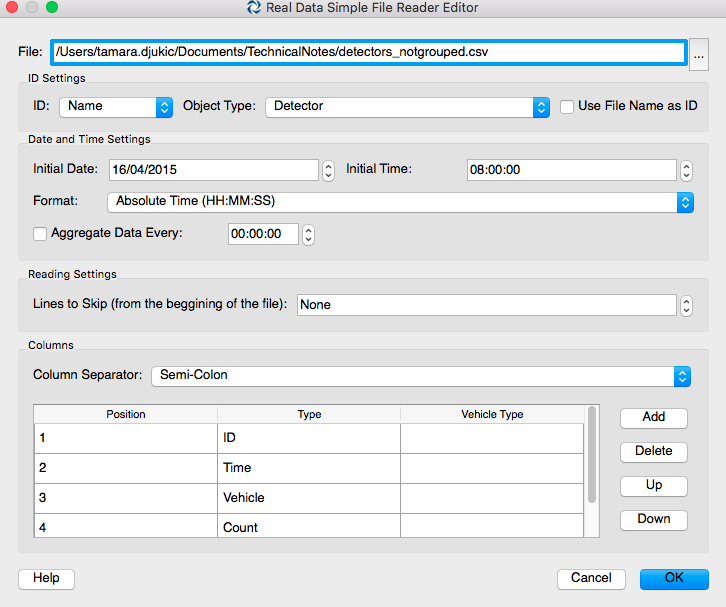
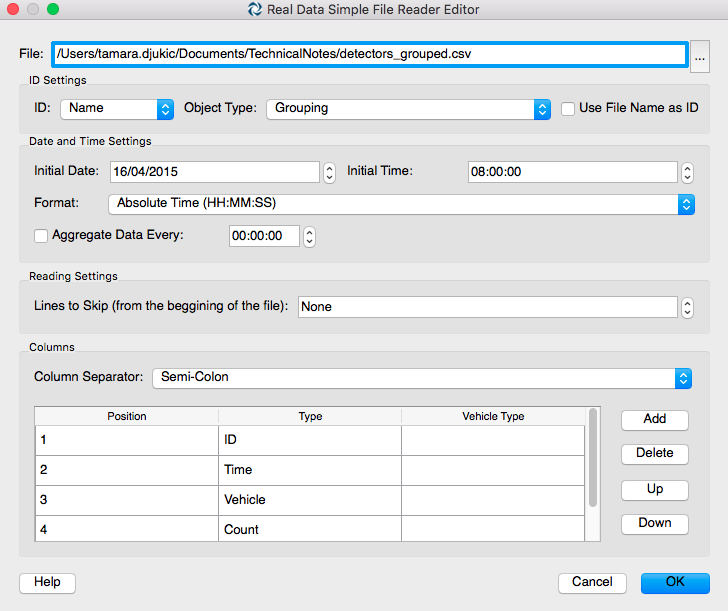
Click to enlarge. Figure 3i, 3ii & 3iii: Definition of the real data set that includes information from screenlines
If you select this real data set for validation in the main tab of a static assignment scenario or dynamic scenario, in the validation tab of the static assignment experiment or replication you will see that Aimsun compares the screenlines and the individual detection points at the same time (Figure 4).
Note that you have to right-click on the grouping category for screenlines and select refresh statistics at the end of the assignment or simulation if you haven’t enabled the calculation of outputs for groupings in the scenario outputs.

Click to enlarge: Figure 4. Display of screenline data used for validation


