


Importing SCATS traffic signal control data into Aimsun Next
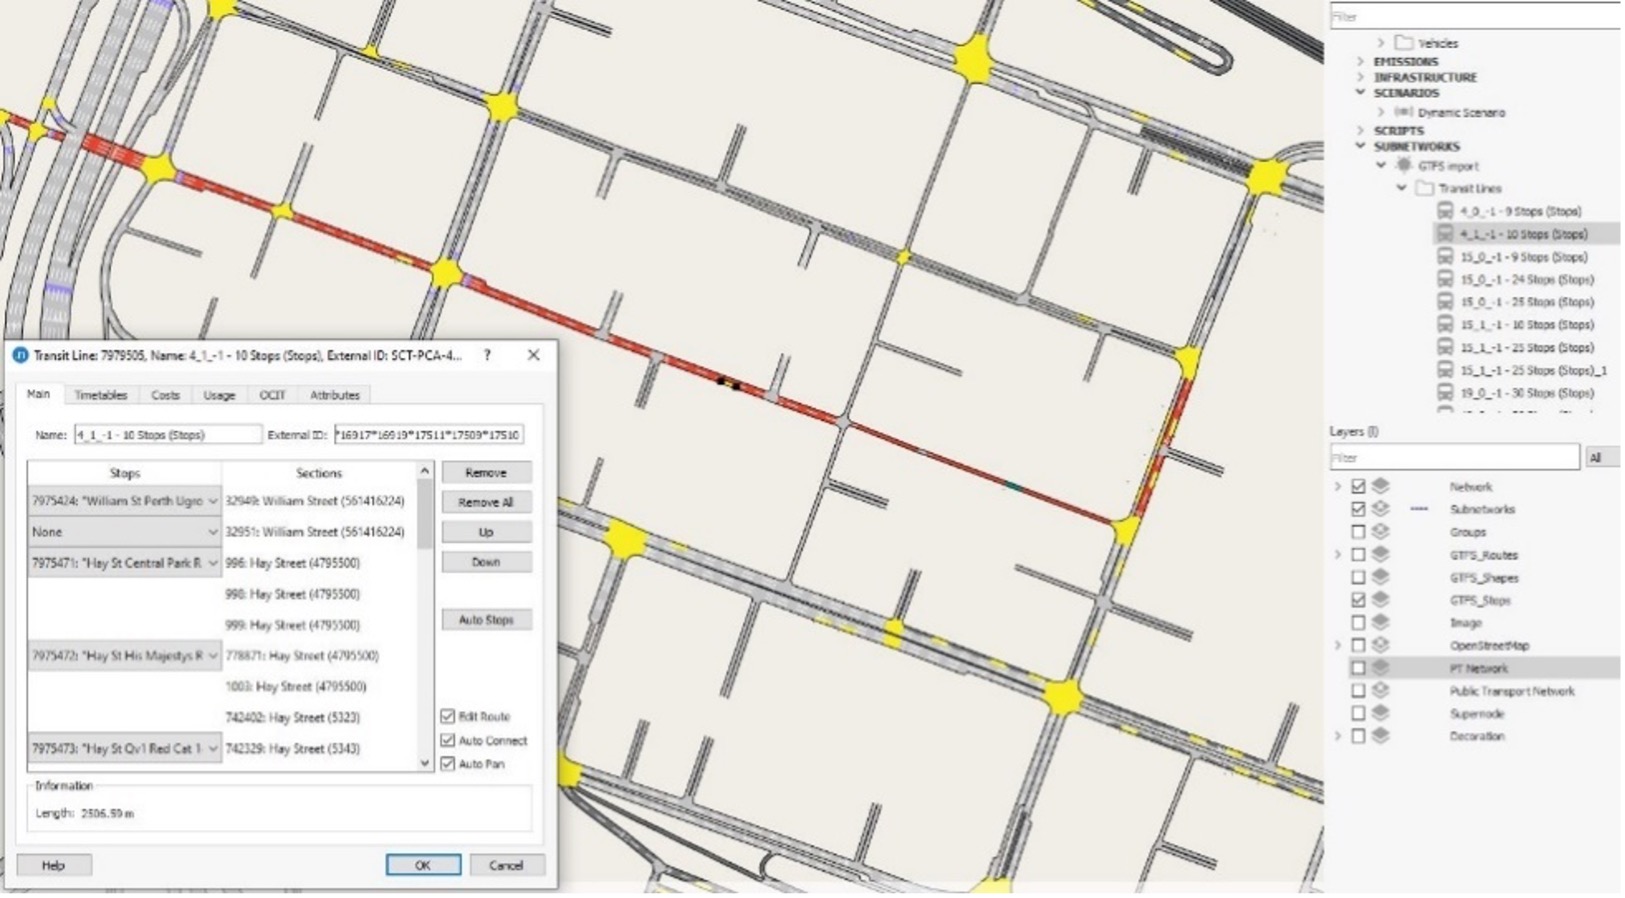
February 2022: The SCATS traffic control system is designed to optimise traffic flow. Dimitris Triantafyllos explains how the SCATS ITS Interface can import data from SCATS ITS into the Aimsun Next network.
