In Part 1 of 2 notes on roundabouts, Tessa Hayman explains different methods of coding roundabouts for different roundabout layouts, ensuring correct lane usage and lane-changing behavior from entry to exit.
There are various ways of coding roundabouts within Aimsun Next, and different designs and behaviors at roundabouts internationally. For instance, Spain, Portugal, France, and the UK all have different rules on lane position and priority. Therefore, it is important to ensure that behavior and lane usage on the roundabout is realistic to the area as well as having accurate levels of flow.
Single lane roundabout
This type of roundabout has 1 lane on the circulation and on all arms of the roundabout i.e. there is no lane changing on the roundabout. Here the roundabout tool is effective at quickly producing a roundabout with give ways.
1. Code the entry and exit arms of the roundabout
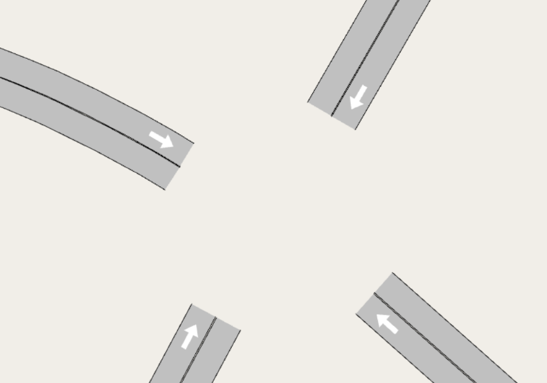
Figure 1: Code the entry and exit arms of the roundabout
2. Select the arms
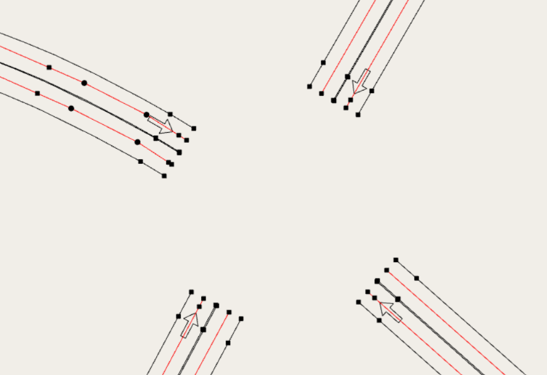
Figure 2: Select the arms of the roundabout
3. Select the roundabout tool and drag from the center of the roundabout to the edge. Make sure that the red outer circle intersects with each arm to ensure a tidy layout.
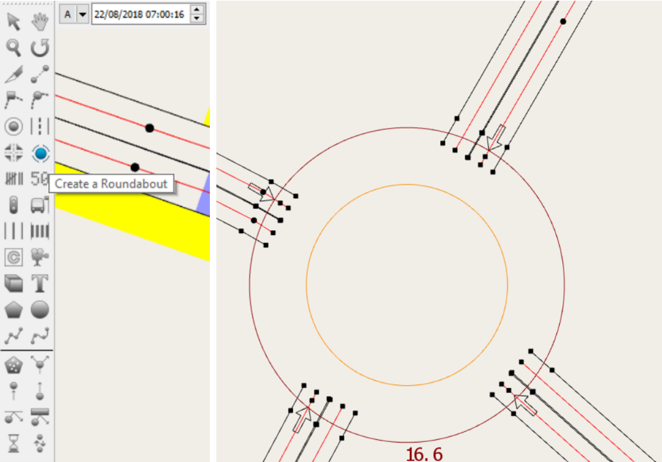
Figure 3: How to use the roundabout tool
4. By default, Aimsun Next generates a two-lane roundabout. To generate a roundabout with a single lane, press ctrl + 1 while clicking and dragging the roundabout to size.
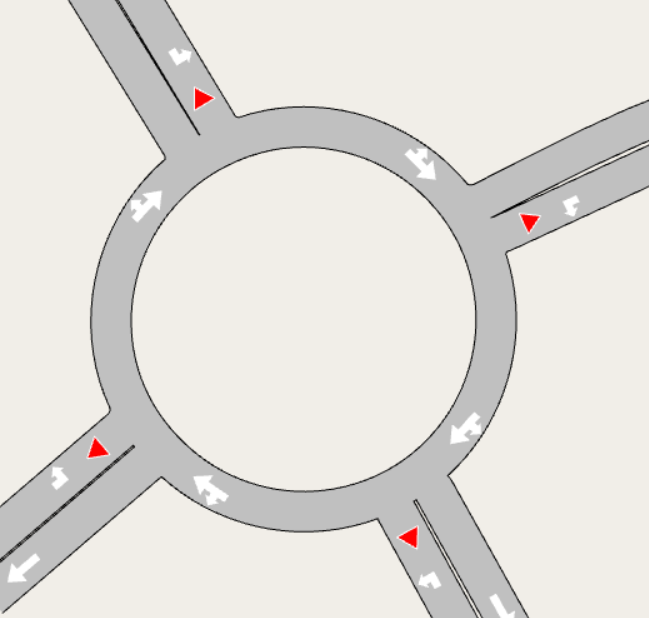
Figure 4: A single-lane roundabout
Multi-lane roundabout – Stay-in-outside-lane style – Spain
You can use the roundabout tool wherever a vehicle can only exit the roundabout from the outside lane, and the inside lane is only used for overtaking and extra capacity.
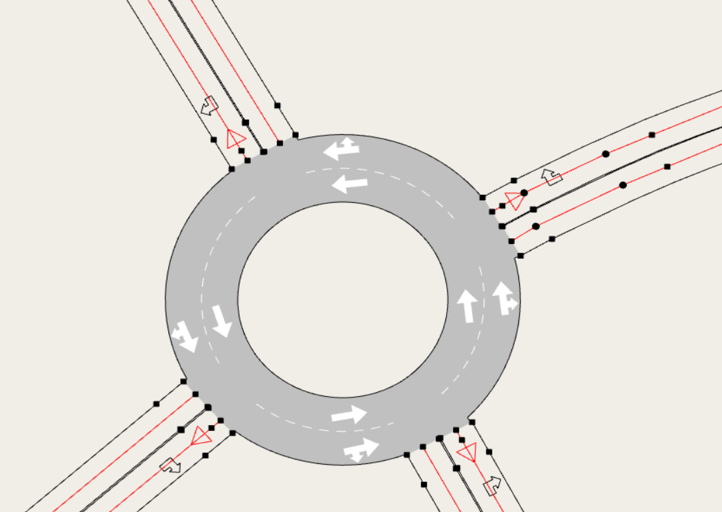
Figure 5: An example of a 2-lane, stay-in-lane roundabout
Multi-lane roundabout – Choose lane-on-entry style – UK, US, Canada, Australia, Norway
In some countries, the entry lane is indicated by the Highway Code or road markings. Generally, a vehicle will use lane 1 to take any exit within 180 degrees of the entry arm and other lanes to take further exits.
Vehicles drive in a spiral, even where lane markings are concentric.
This can be coded by using a section between the entry and exit arm of the same approach and a node between each arm of the roundabout.
Check each possible path that could be taken through the roundabout to ensure that the lane assignment is correct. Where the roundabout has 3 circulating lanes, you may need to use the Advanced Node editor to ensure that the correct lanes are connected. Access the Advanced Editor by right-clicking a selected node.
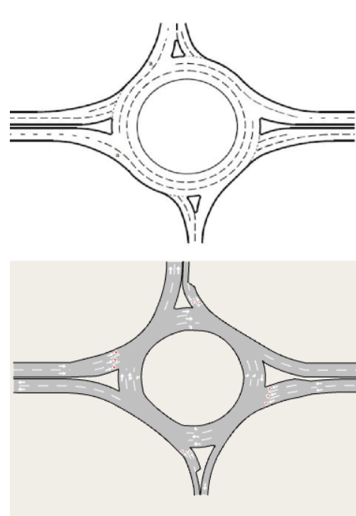
Figure 6: A highway roundabout with 3 spiraling circulating lanes
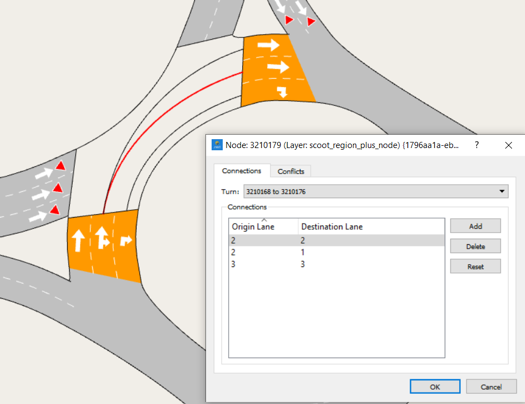
Figure 7: Editing the lane assignment in the advanced node editor
As the turn is now elongated, take care that the turns do not touch to reduce the number of conflict zones.
Set the look-ahead distance/distance zone 1 and distance zone 2 to at least the roundabout circumference; this ensures that vehicles entering the roundabout are aware of the correct lane for their exit.
Mini roundabouts
A mini roundabout is a small roundabout with a painted or slightly raised circle that a vehicle can driver over. They can be coded as a node with all turns assigned a give way.
Use detailed give ways to ensure that traffic “gives way to the right/left”. Access detailed give ways via the node properties and Give Way tab.
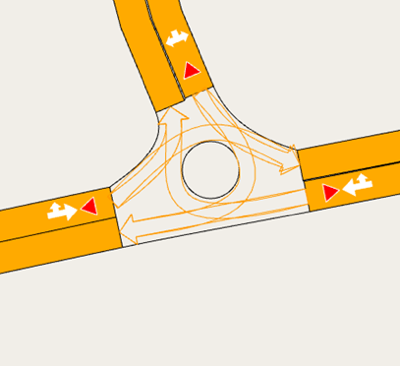
Figure 8: An example of a mini roundabout
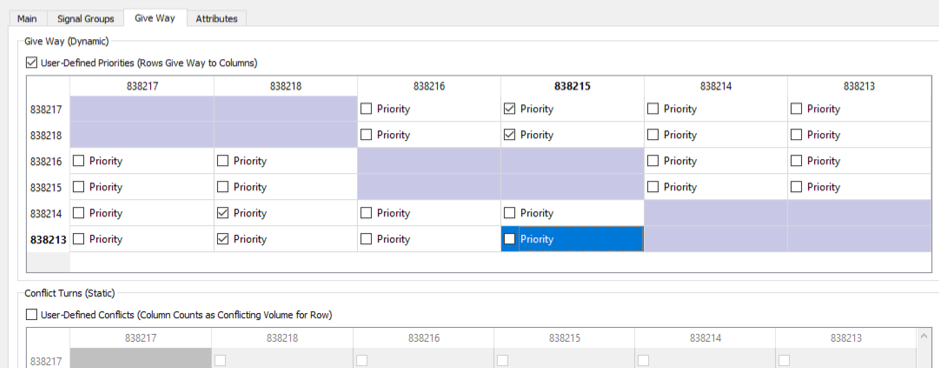
Figure 9: The detailed give-way menu
